How to Send Completed Certificates?
Once you have your certificate template, email template, and program created, you can proceed with mass sending of credentials.
Go to “Credentials” Tab
Log into your CertifyHub account. Find the “Credentials” tab in the navigation menu on the left and click it. Select “Issue new credential” to start the certificate sending process.
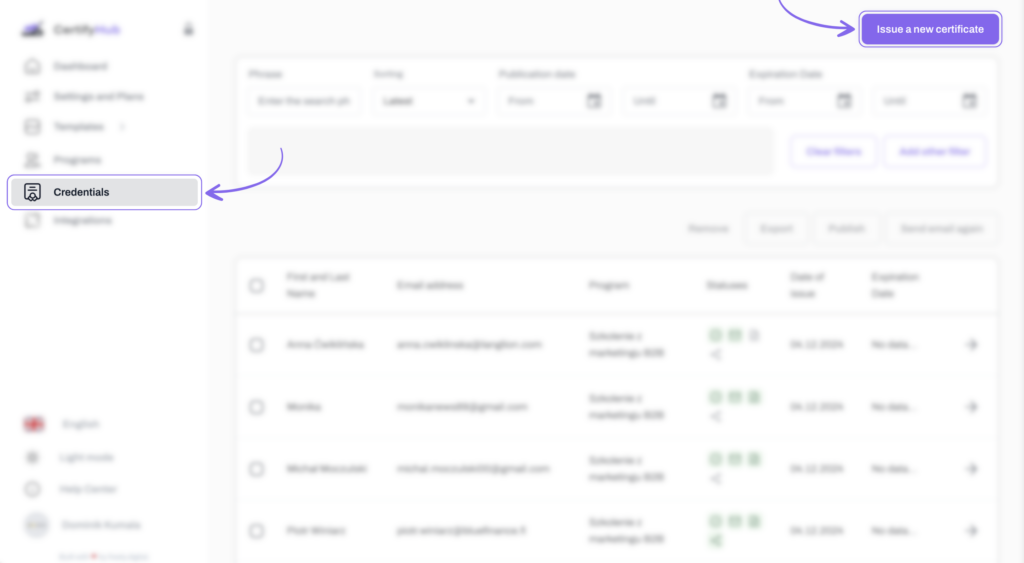
Choose the Appropriate Program
From the list of available programs, select the one for which you want to issue and send credentials.
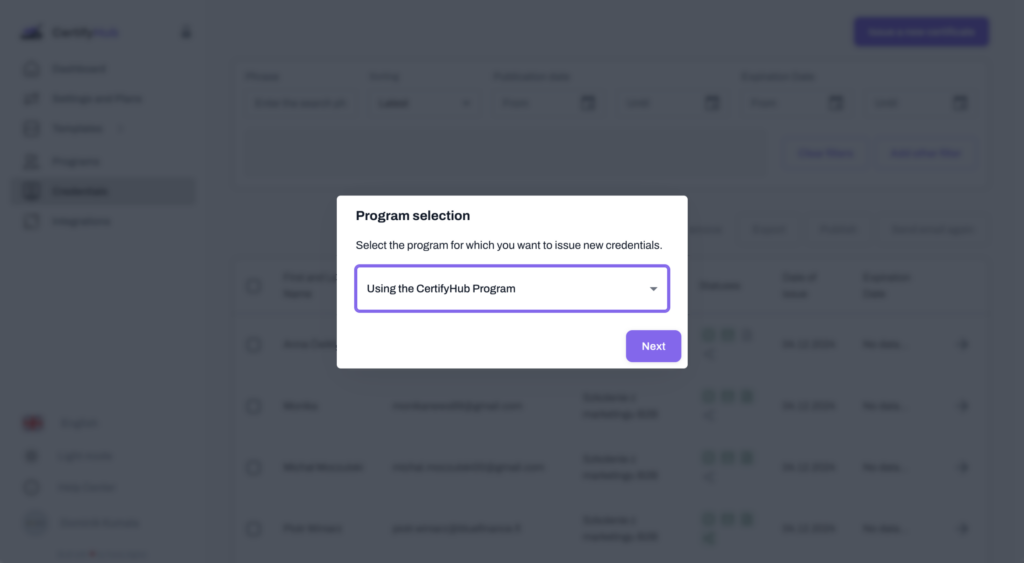
Add Certificate Recipients
You can add recipients in two ways:
- Manual recipient entry — enter required recipient data (e.g., first name, last name, and email address) in appropriate fields.
- Import recipients from file — if you have a large number of recipients, use the Excel (.xlsx) or CSV file import function.
Preparing the Import File
Download File Template
To make preparing your recipient list easier, use the “Download sample file” function available in the system. The file is provided in .xlsx or .csv format and contains a sample data structure.
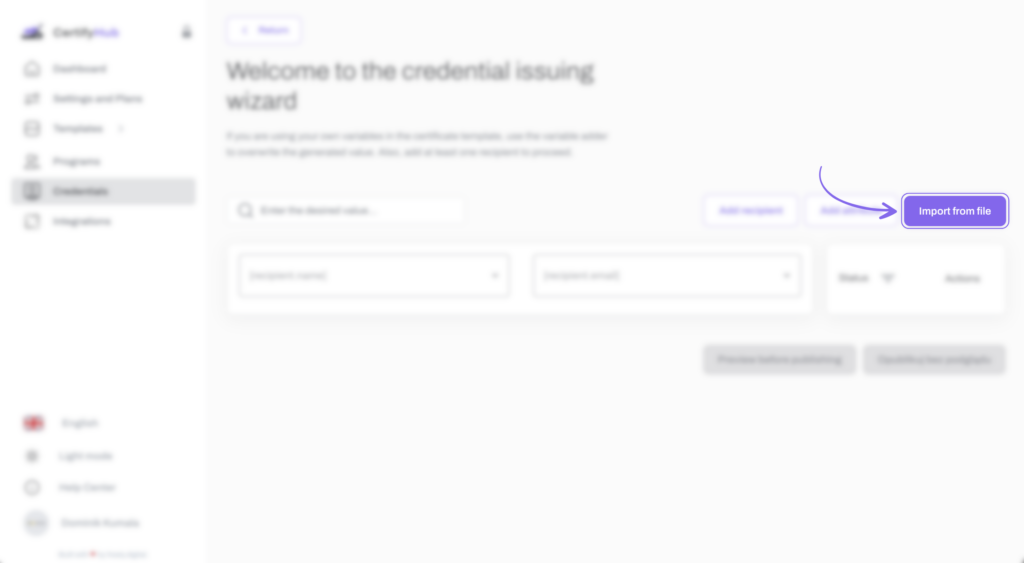
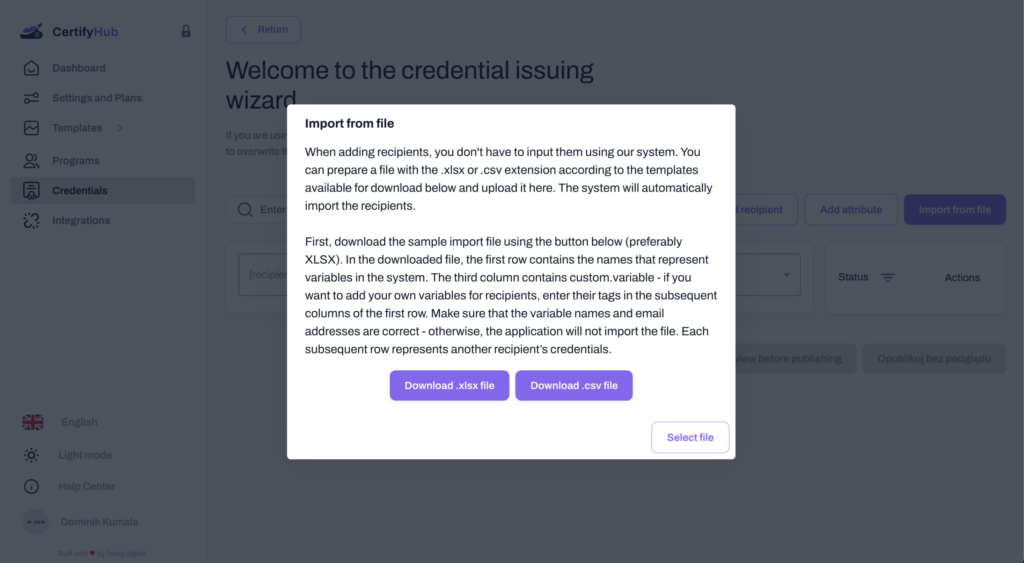
The first row of the file contains column headers that correspond to the required variables needed for proper data import.
Fill in Recipient Data
Fill the file with participant data by entering information in appropriate columns. In subsequent rows, provide the name (e.g., first and last name) and email address of each recipient. If you want to include additional information (e.g., certificate number, program completion date), add new columns and label them in the first row according to system configuration.
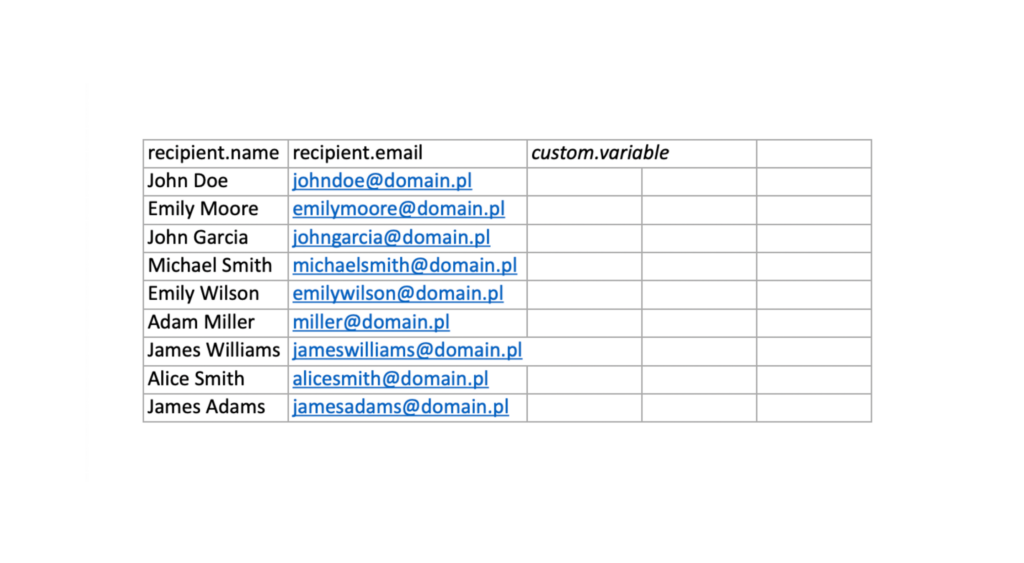
Upload File to System
After completing the data, save the file in .xlsx or .csv format. In CertifyHub, click “Add recipients from file” and select the prepared file from your computer.
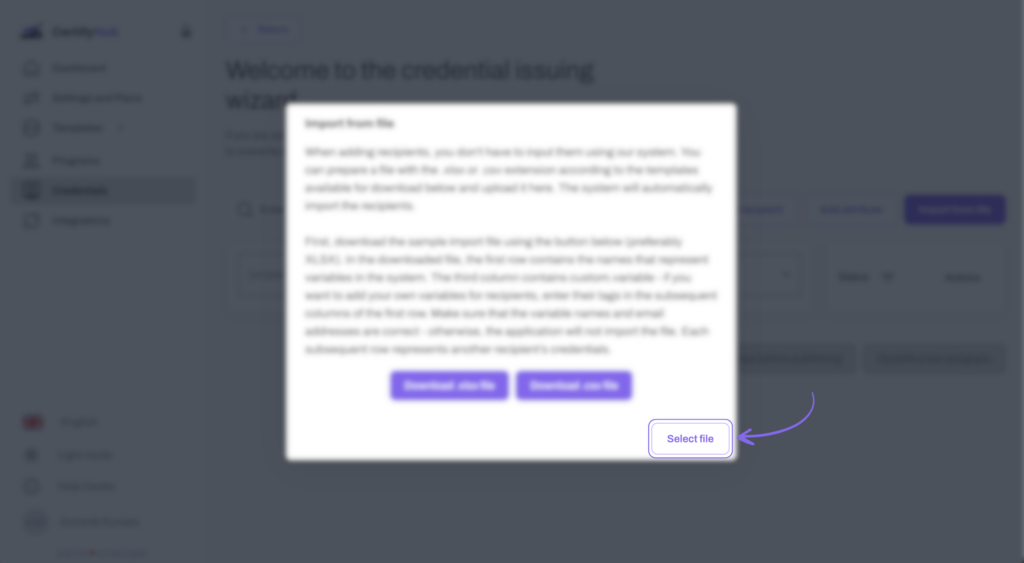
The system will automatically read the data, import it, and display the recipient list in the credentials creator.
Tip: Empty fields in variable columns will be ignored by the system.
Preview and Publish Credentials
After adding recipients, all information will appear in the credentials creator. Before final sending, it’s worth:
- Previewing the certificate — click “Preview” to ensure the certificate looks as expected.
- Publishing credentials — if everything is ready, click “Publish.” The system will automatically send certificates to the email addresses of all recipients on the list.
And you’re done! Recipients will receive an email with a link to download their certificate.