What are Variables and How to Use Them?
Variables in CertifyHub are dynamic elements that automatically fill in when creating certificates, badges, and email messages. They allow you to personalize content and streamline the mass credential issuing process, ensuring each participant receives a correctly filled certificate while saving you time and minimizing the risk of errors.
Types of Variables in CertifyHub
In CertifyHub, you have access to default variables that cover the most commonly used data. You can also create your own variables according to your needs.
Example default variables:
- {recipient name} – recipient’s first and last name
- {program name} – name of the program for which credentials are being issued
- {issuer name} – name of the company or organization issuing the certificate
- {credential id} – unique certificate identifier
- {valid for} – certificate validity period (e.g., 1 year)
How to Add Custom Variables?
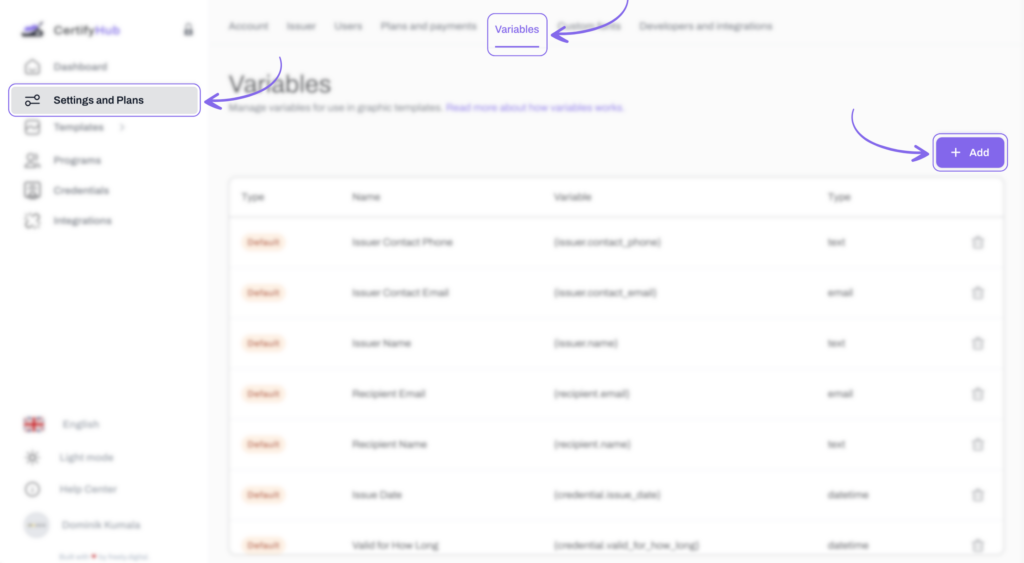
Go to “Settings & Plans” and click “Variables” in the navigation panel on the left. Click the “Add” button in the top right corner.

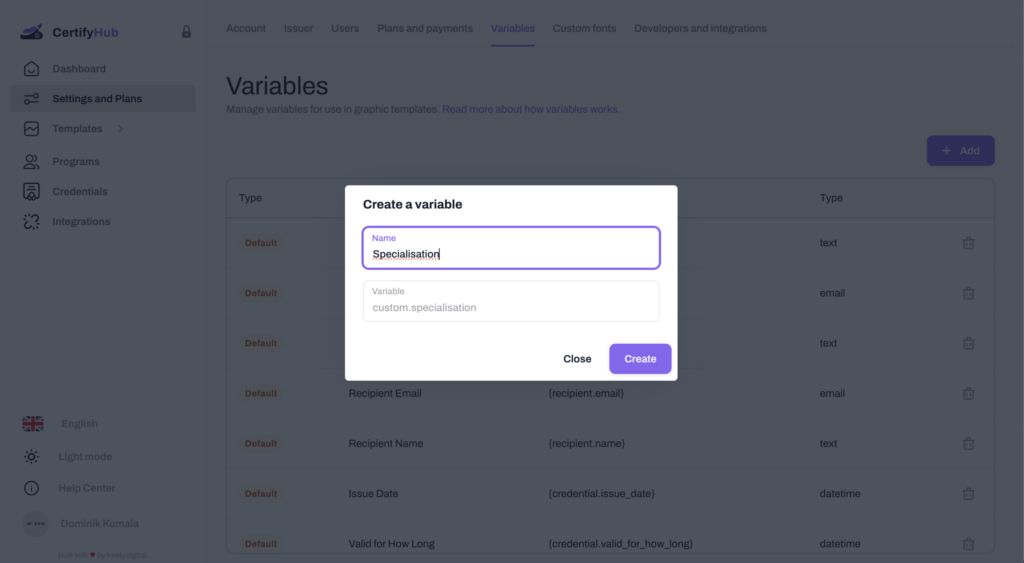
In the “Create variable” window, enter the variable name, e.g., “Specialization”. A variable will be automatically generated in the format custom.name, for example “custom.specialization”.
When you’ve entered the appropriate name, save the variable by clicking “Create”. The new variable will appear in the list and be ready to use in certificate templates or messages.

How to Use Variables?
While creating a certificate template, badge, or email message in the template creator, you can use variables to automate the personalization process.
Simply select a variable from the list of available options (e.g., recipient name or issue date) or create a new one while designing your certificate, badge, or email template and place it anywhere on the template.
When issuing certificates, badges, or sending email messages, the system will automatically replace variables with specific recipient, issuer, or program data.
Important: Data is pulled from the imported .xlsx or .csv file.
For more information about issuing credentials and preparing data import files, click here.