How to Create an Email Template for Sending Certificates?
In CertifyHub, you can create an email template that will be used for automatic certificate delivery. This ensures a consistent and professional image of your company.
Below you’ll find detailed step-by-step instructions on how to create and customize an email template for sending certificates.
Go to Issuer Email Settings
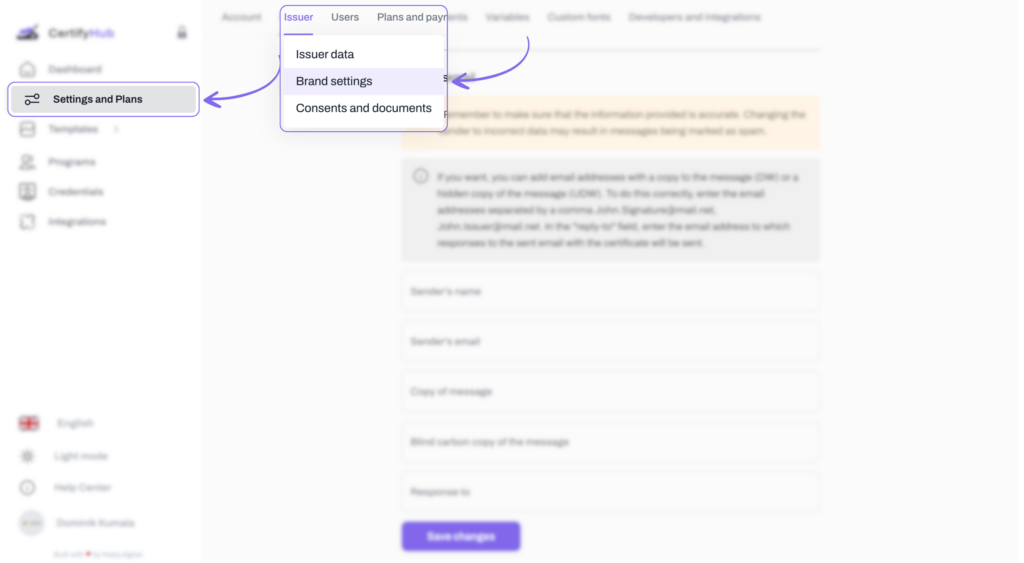
Log into your CertifyHub account and select “Settings & Plans” in the navigation panel on the left. Then go to the “Issuer” tab.
In this tab, you’ll find the “Issuer Email” option. This is where you can configure key email message settings.

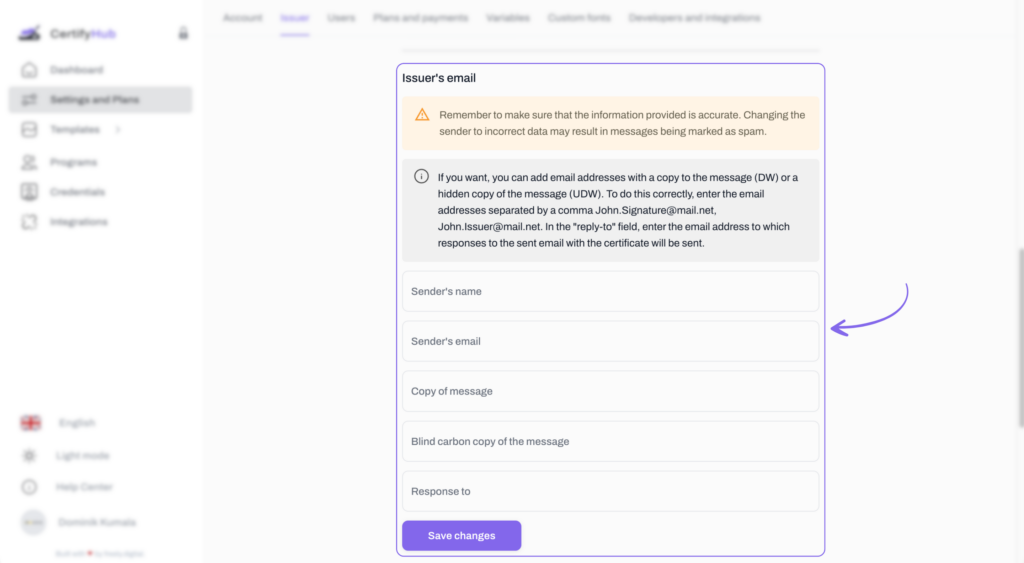
Set Basic Email Data
In the “Sender Name” field, enter your name or company name that will be visible to the message recipient in the “From” field. Make sure the provided address is correct to avoid delivery issues. If the address doesn’t exist or is incorrect, your emails might end up in spam or won’t be delivered.
Sender Email Address
Enter the email address from which certificate messages will be sent.
Carbon Copy (CC)
In the “CC” field, you can enter email addresses that should receive copies of each certificate message, such as your team members. Remember that addresses entered in this field will be visible to the main message recipient.
Blind Carbon Copy (BCC)
If you don’t want main recipients to know about other message recipients, you can enter email addresses in the “BCC” field that should receive hidden copies of the message.
Reply-To Address
In the “Reply-To” section, provide the email address where recipient responses should go. For example, you can direct certificate recipient responses to the customer service department.

Save Changes
After filling in all fields, click the “Save Changes” button so the system can remember your settings. And you’re done!