How to Add New Users to the System?
If you want other team members to have access to the system, you can add them as new users and assign appropriate roles. This way, everyone can use the system features according to their assigned permissions.
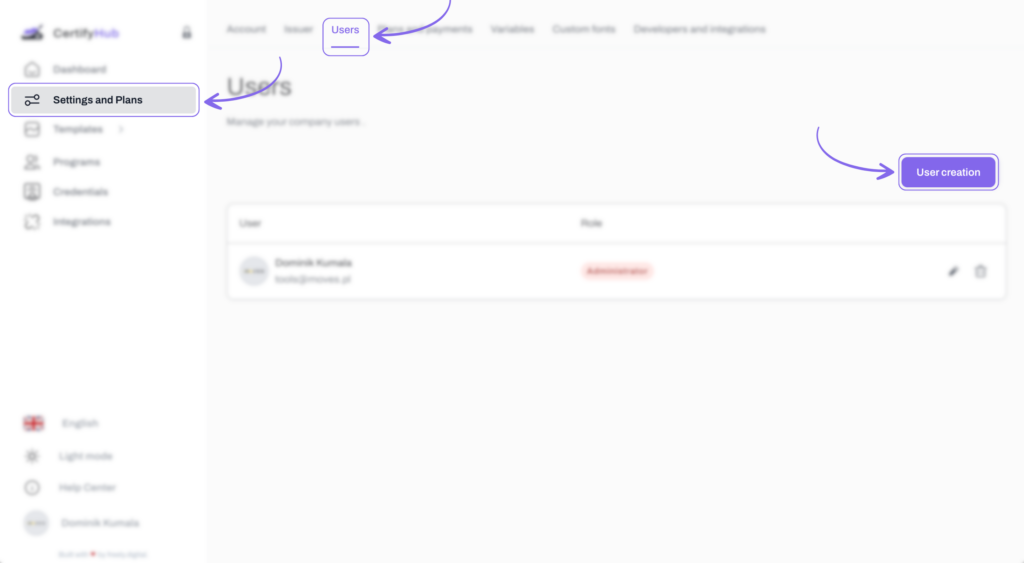
Go to the “Users” tab, which you’ll find after clicking “Settings & Plans” in the navigation panel on the left side. Select “Add User,” then fill in the required information.

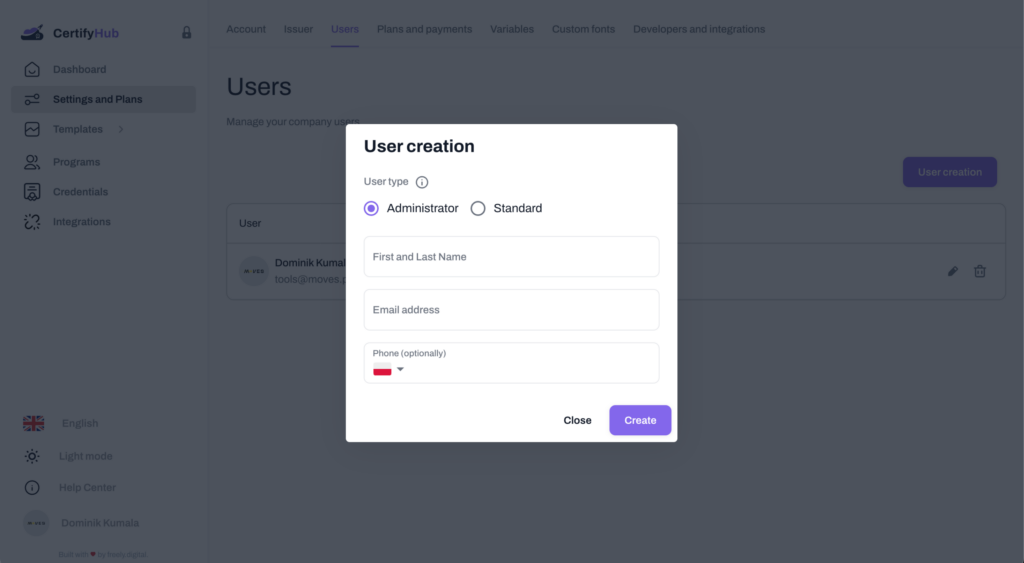
- User Type — you have two options available: “Administrator” and “Standard”:
- If the new user is to serve as an administrator, they will have full access to all system functions, identical to yours.
- If you choose the “Standard” role, you can assign more limited permissions to the user. From the dropdown list, you can select specific tasks that the new user will be able to perform, such as creating programs, issuing credentials, or adding images in templates.
- First and last name
- Email address
- Phone (optional)
After filling in all necessary information, just click the “Create” button. At this point, the system will automatically generate an account for the new user and send them an email. This email will contain a temporary password and a link to the login page.

And done! You’ve successfully added a new user. Now you can use the system together within one subscription plan.